

Photo by Marvin Meyer on Unsplash
How to Build and Deploy a Web Scraper(Job Project) using Go and PipeOps


In today's era of big data and information abundance, web scraping has become an indispensable tool for data extraction from websites. Whether you are gathering market intelligence, monitoring competitors, or automating repetitive data collection tasks, web scraping can save you considerable time and effort. In this comprehensive guide, we will walk you through the process of creating and deploying a simple web scraper using Go and PipeOps, a robust platform for cloud deployment and infrastructure management.
What is a Job Project?
A job project is designed to execute specific commands or tasks at predefined intervals. In the context of web scraping, it allows you to set up routines that periodically visit websites, extract data, and perform scraping tasks. This scheduling capability makes job projects ideal for recurring tasks like data updates, website monitoring, or information aggregation.
Why PipeOps?
PipeOps is a no-code tool tailored for cloud deployments and infrastructure management. It simplifies the process of configuring and handling cloud infrastructure, akin to deploying applications on platforms such as Heroku, a cloud platform-as-a-service (PaaS). By using PipeOps, you can concentrate on enhancing your products without the need to worry about the underlying infrastructure, enabling you to better serve your customers.
Prerequisites
Before we dive into building our web scraper project, let's make sure you have the necessary tools and knowledge:
Go Programming Language: Familiarity with Go is essential as we'll be using it to build our scraper. If you're new to Go, check out the official Go documentation.
PipeOps Account: Sign up for a PipeOps account if you don't already have one. You can create an account at PipeOps.
Basic Knowledge of Web Scraping: Understanding the basics of web scraping, such as HTML structure and selecting elements, will be beneficial.
Setting up the environment
Let's initiate your project by creating a new directory and initializing a Go module within it. Open your terminal and execute the following commands:
// Create a new project folder named 'pipescrape'
$ mkdir pipescrape

// Move into the 'pipescrape' directory to begin working on our project
$ cd pipescrape

// Initialize a new Go module
$ go mod init pipescrape
Building the Go Web Scraper
To kickstart the development of your web scraper, begin by installing the Colly Go package, With Colly you can easily extract structured data from websites, which can be used for a wide range of applications, like data mining, data processing or archiving.
$ go get -u github.com/gocolly/colly
With the necessary dependencies in place, create a Go file, such as scraper.go, and begin building. Below is a straightforward example using the Colly library:
package main

import (
    "fmt"

    "github.com/gocolly/colly"
)

func main() {
    c := colly.NewCollector()

    // Find and visit all links
    c.OnHTML("a[href]", func(e *colly.HTMLElement) {
        e.Request.Visit(e.Attr("href"))
    })

    c.OnRequest(func(r *colly.Request) {
        fmt.Println("Visiting", r.URL)
    })

    c.Visit("http://go-colly.org/")
}
This simple code sets up a web scraper using the Colly framework, starts at the URL "http://go-colly.org/", and recursively follows all the links it finds on web pages by executing the specified callback functions. It also prints a message for each URL it's about to visit. This code essentially crawls and explores the web pages within the specified domain and its subdomains.
Deploy and Monitor Your Web Scraper Project
Now that we've built our scraper, it's time to deploy it to the cloud so that it can run at any given time we specify. This is where PipeOps comes in.
First, we need to create a new Job project on Pipeops:

Choose your repository source from options like GitHub, Gitlab, or Bitbucket. Once you've made your selection, select your account name to access the list of repositories under your ownership. In this case, select the pipescrape repository, which is the repository we're using for this example, and then click the "Proceed" button to continue.

You will see the image below. You can also update your environment from the default environment to production, in this case, we will use the default environment.

Once you've clicked the "Proceed" button, you'll be directed to the project build settings page. Here, you have the flexibility to choose your preferred framework or programming language and the build method that suits your needs. Additionally, you can configure essential job details, including the job command and the desired execution interval. PipeOps also provides a valuable feature that allows you to incorporate project-specific environment variables to tailor your deployment.

For this example, we've opted for Go as our framework, selected the Heroku build pack as our chosen method, and configured the job to run at one-minute intervals. This customization ensures that your project operates precisely as you envision.
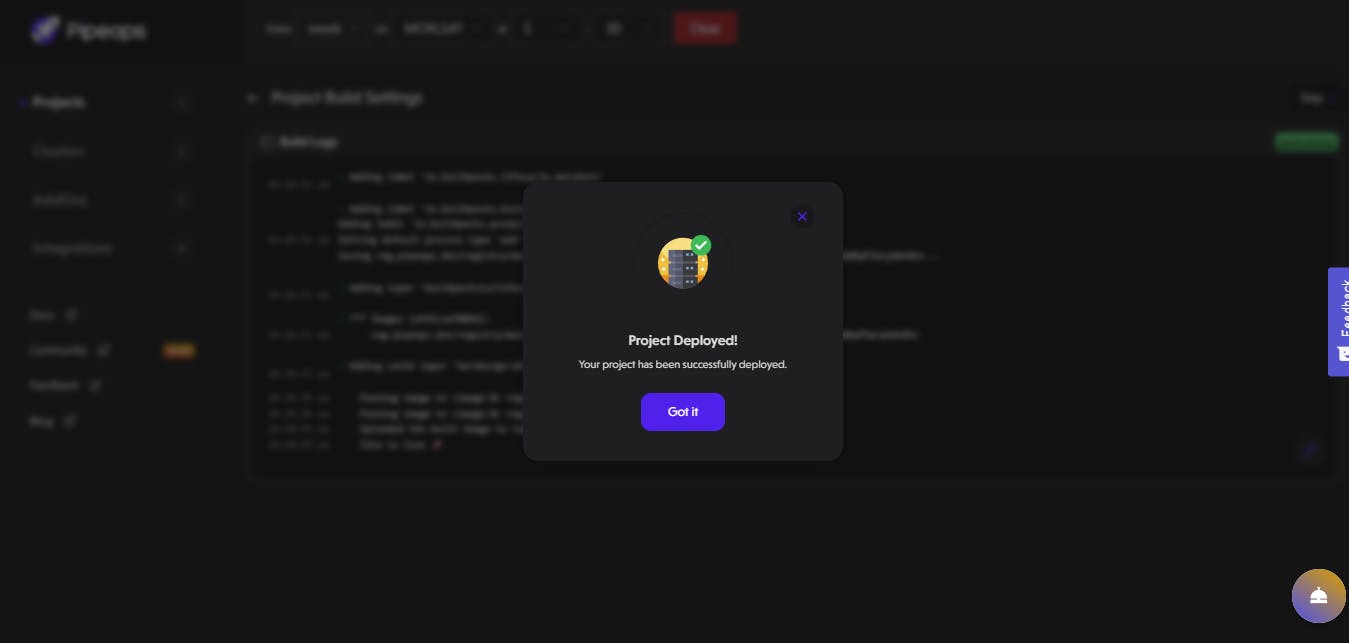
Click on the "Deploy Project" button to deploy your project, and once the deployment is complete, you will see a success message as shown in the image below.
After successfully deploying your project click on the jobs tabs to view your jobs run at every interval you set it to:

Conclusion
Building and deploying a Go web scraper on PipeOps offers an efficient and organized way to automate data extraction tasks. With the power of Go and the simplicity of PipeOps, you can scrape, process, and utilize data from the web effectively. Whether you're a data analyst, a developer, or a business owner, this combination can help you make informed decisions by harnessing the vast amounts of data available on the internet. Start scraping smarter with PipeOps today!