

Photo by Alex Knight on Unsplash
Create Your Own Discord Bot With Python and PipeOps - Deploy In No Time!


Are you looking to take your Discord community to the next level? One way to achieve this is by creating a custom bot. With custom functionalities, you can make your bot unique. Furthermore, you can deploy your bot for free using PipeOps. This article will guide you through the process of creating a custom Discord bot that greets new community members. You will also learn how to host this bot on PipeOps for free.
What do you need to get started?
After reading the introduction, you may be wondering how to get started. As you read on, you will learn more about what you need to begin.
You need to have Python installed. If you don't have it already, you can learn more about it and download it from here.
You need a code editor. In this article, we will use Visual Studio Code.
You need to have a Discord account and either belong to a Discord community or be an admin of one.
You need to have a PipeOps account.
Once you have these in place, you're ready to start building your Discord bot!
Get Started
To get started, open your terminal or command prompt and run the commands below:
# Create a new project folder named 'pipebot'
$ mkdir pipebot

# Move into the 'pipebot' directory to begin working on our project
$ cd pipebot
Python Virtual Environment
To ensure that our project has its own isolated Python environment, we will create a virtual environment. This will allow us to install the necessary packages and dependencies without affecting the global Python installation on our system.
To create a virtual environment, run the following command:
# Create a new virtual environment named 'venv'
$ python3 -m venv venv
This will create a new directory called 'venv' inside our project folder(pipebot).
Next, we need to activate the virtual environment by running:
# Activate the virtual environment
$ source venv/bin/activate
Now that our virtual environment is activated, we can start installing the packages we need for our Discord bot.
Install Discord.py
To interact with the Discord API and build our bot, we will be using the discord.py library. To install it, simply run the following command:
# Install discord.py
(venv) $ pip install discord.py
This will install the latest version of discord.py into our virtual environment.
Building our Discord Bot
Now that we have our project set up and our packages installed, we can start building our Discord bot. We'll begin by creating a new Python file called bot.py in our project directory.
In this file, we'll first need to import the discord.py library and create a new client object:
import discord

intents = discord.Intents.default()
intents.members = True
client = discord.Client(intents=intents)
This creates a new instance of the Client class, which we can use to interact with the Discord API and build our bot.
Next, we need to add an event listener that will run whenever a new member joins our server. We'll use the on_member_join event for this:
@client.event
async def on_member_join(member):
    # Send a welcome message to the new member
    await member.send(f"Welcome to our server, {member.name}!")
Here, we're defining a new coroutine function that takes in a member object as its argument. Whenever a new member joins our server, this function will be called, and it will send a welcome message to the new member via a direct message.
Finally, we need to add some code to log our bot into the Discord API using our bot token to generate your token check here:
# Replace 'YOUR_BOT_TOKEN' with your actual bot token
client.run('YOUR_BOT_TOKEN')
And that's it! With these few lines of code, we've created a simple Discord bot that welcomes new members to our server. Of course, you can customize this bot to do much more, like moderating channels, responding to commands, or integrating with external APIs.
Deploying our Bot with PipeOps
Now that we've built our bot, it's time to deploy it to the cloud so that it can run 24/7 and serve our community. This is where PipeOps comes in.
First, we need to create a new worker project on Pipeops:
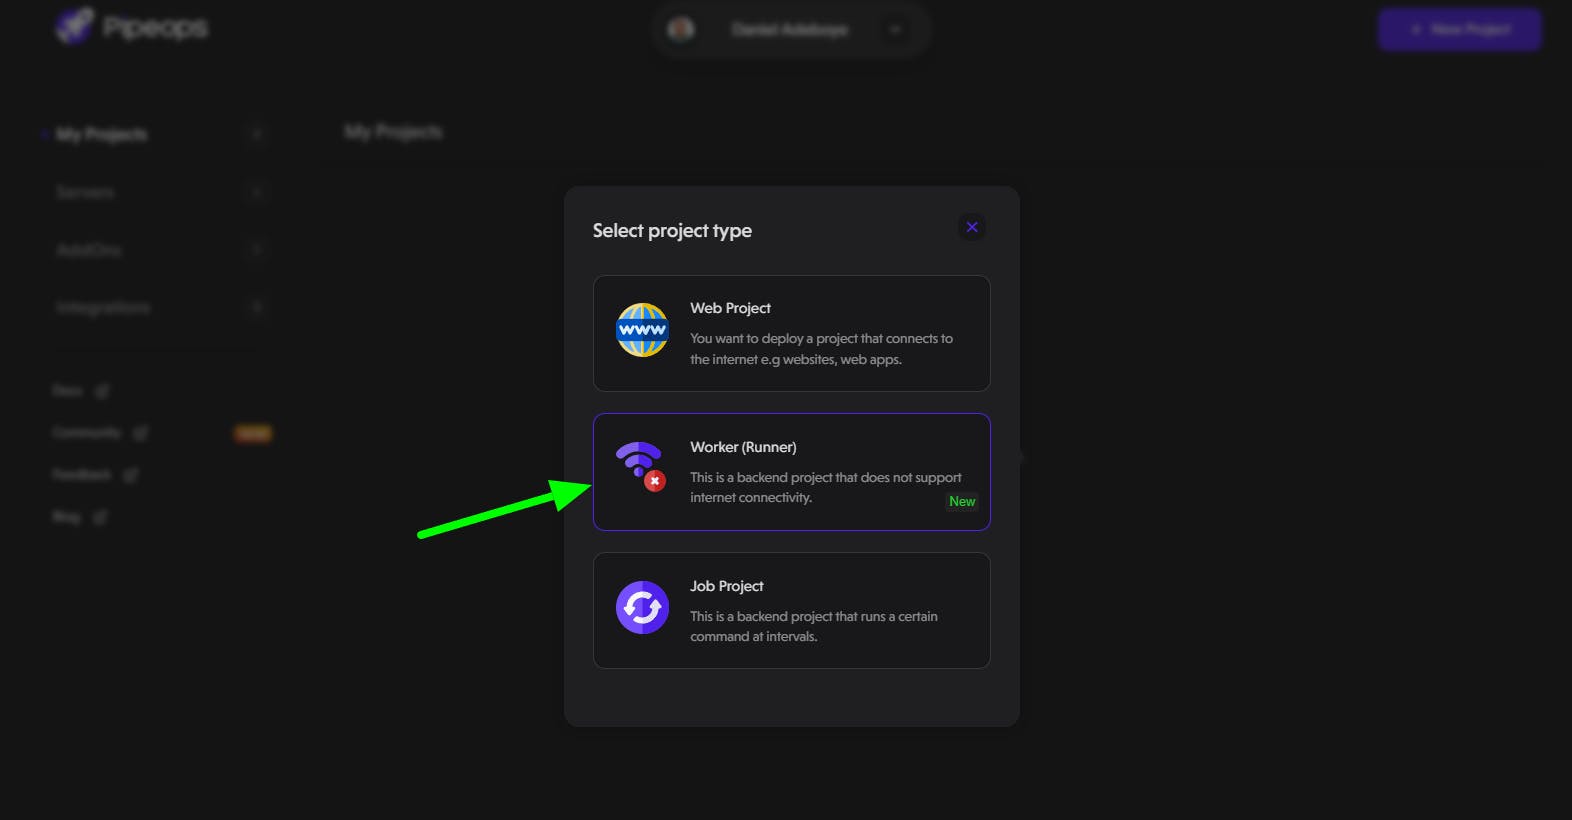
you need to select Github as your repository source. After that, you can select your account name to access the list of repositories that you own. From there, select the pipebot ****repository to work with after that click on proceed.

You will see the image below. You can also update your environment from beta to production, but for this case, we will use Beta.

After clicking the "Proceed" button, you will be redirected to the project build settings page. Here, you can select the framework or programming language and the build method that you prefer. PipeOps also offers a feature where you can add your project environment variables to customize your deployment.

Click on the "Deploy Project" button to deploy your bot. Once the deployment is complete, you will see a success message as shown in the image below.

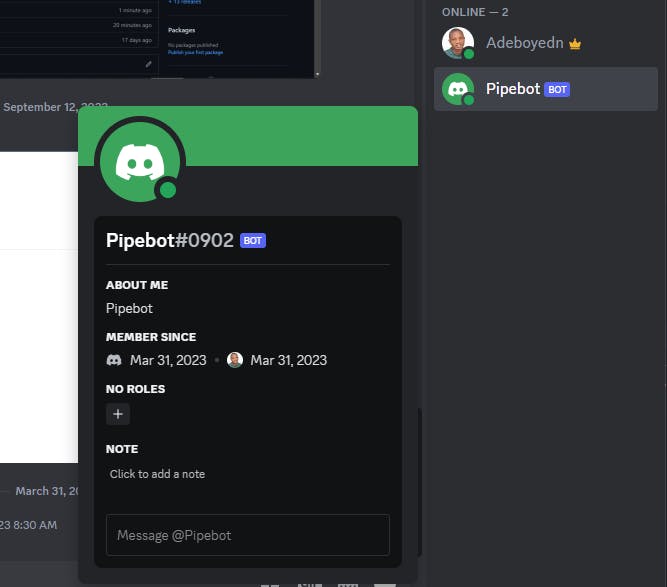
Below is an image showing that the bot you just deployed is active:
Conclusion
in conclusion, creating your own Discord bot can be a great way to enhance your community's experience, and with Python and PipeOps, it's easier than ever to get started. In this article, we have learned how to create a custom Discord bot that greets new community members and how to deploy it using PipeOps. We have covered everything from setting up our development environment to deploying our bot in the cloud. With this knowledge, you can create your own custom bot with unique functionalities and deploy it in no time. So, what are you waiting for? Go ahead and start building your own bot today!