


Amazon Web Services (AWS) has solidified its position as a leading cloud platform for both developers and DevOps engineers to deploy their projects. If you're a startup or developer utilizing FastAPI for your backend and eager to deploy your project on AWS, this guide is tailored to assist you. Here, you'll learn the step-by-step process of deploying your FastAPI project on AWS using PipeOps.
What do you need to get started?
Before diving into the deployment process, make sure you have the following essentials:
An active AWS account
Your FastAPI project ready (You can utilize the PipeOps FastAPI starter kit from this repository)
A valid PipeOps account
Integrating Amazon Web Services (AWS) with PipeOps
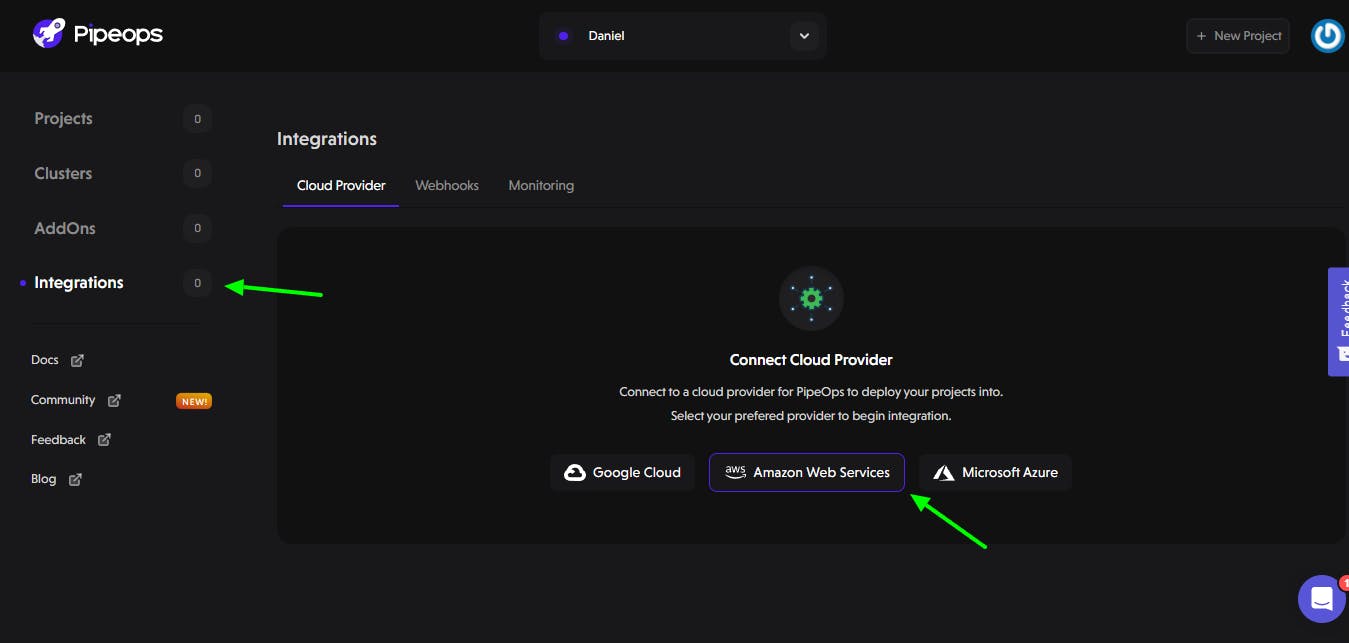
Access your PipeOps account and navigate to your dashboard. Locate and select the "Integrations" tab. Doing so will lead you to a page prompting you to establish a connection with a cloud provider. Click on the option labeled "Amazon Web Services" to proceed.
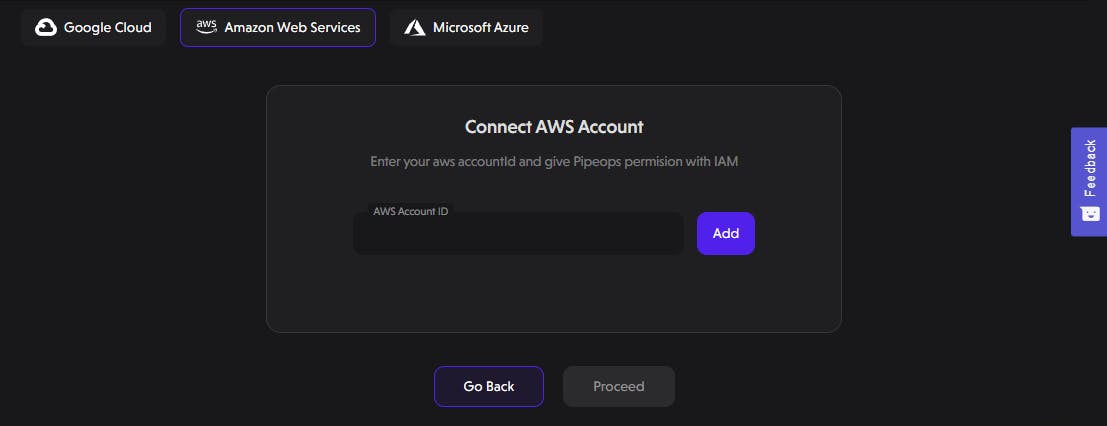
Once you've chosen Amazon Web Services (AWS), a fresh user interface (UI) will appear. Within this UI, you'll need to input your AWS account ID. By providing this information, you're granting PipeOps the necessary permissions via IAM (Identity and Access Management).
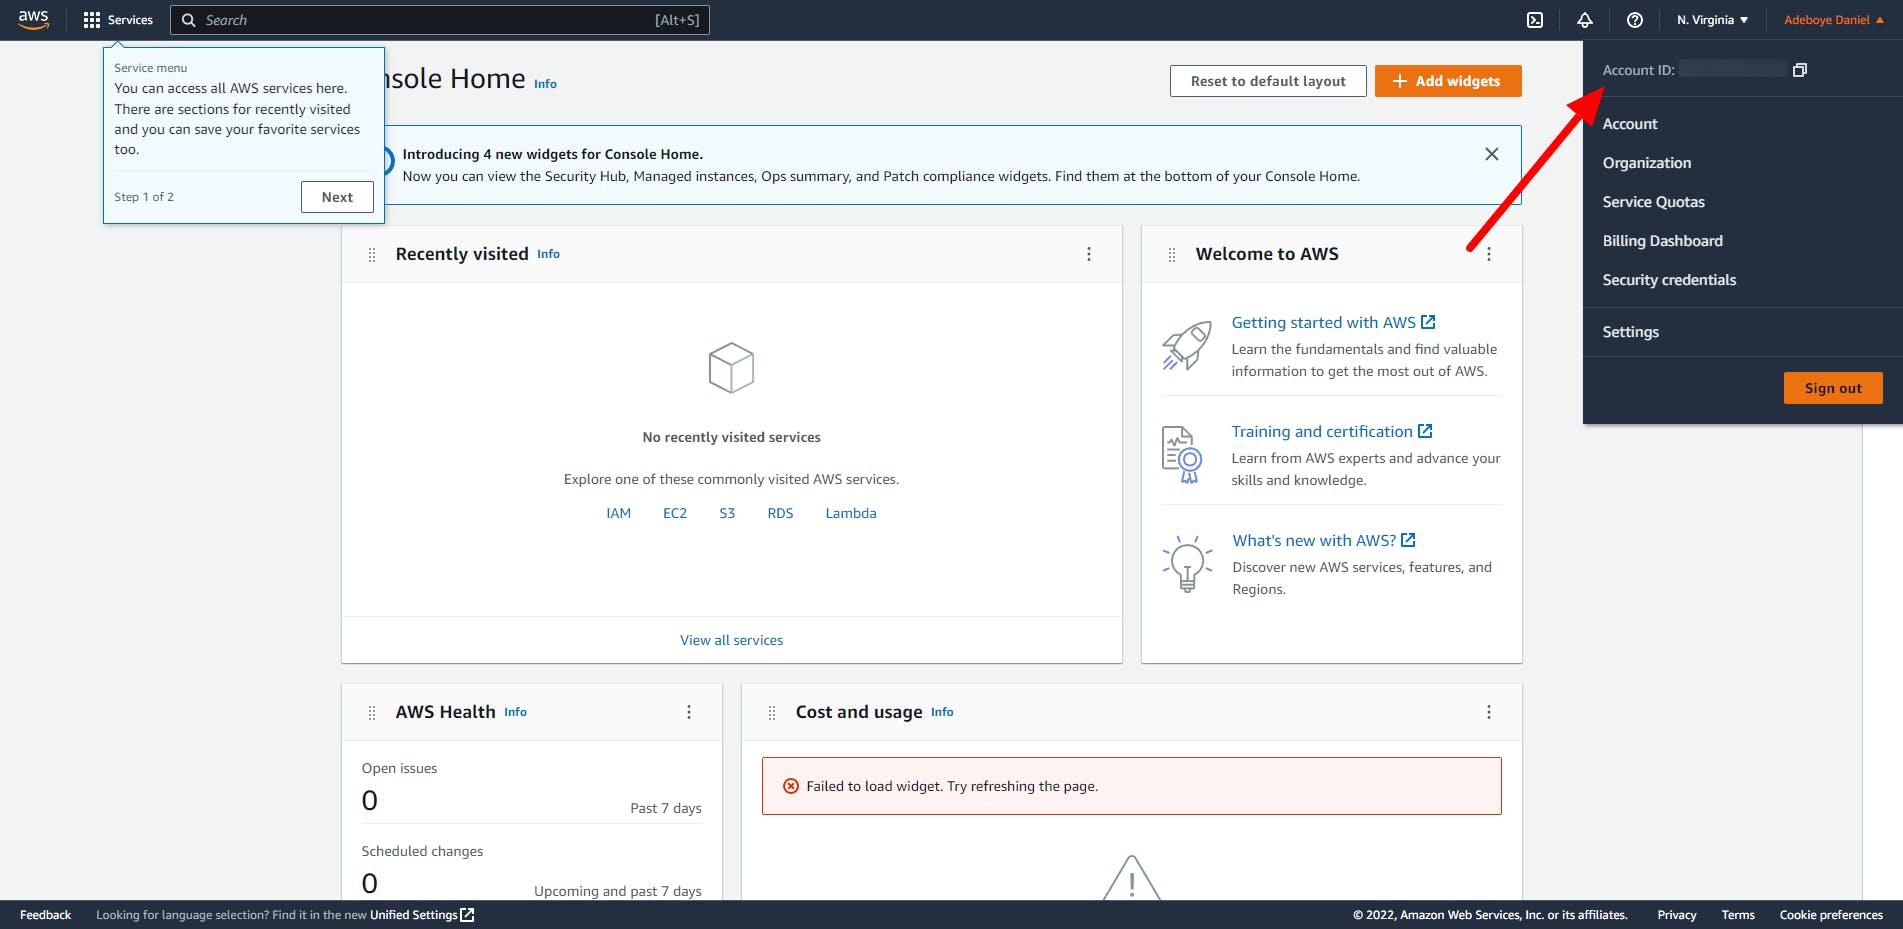
Within the AWS platform, locate and click on your profile name. Doing so will reveal your AWS Account ID, which you'll need for the subsequent steps.
Authorize with IAM.

Creating a Cluster on PipeOps
Upon successful authorization via IAM, you will be automatically redirected to the cluster creation page. Here, you have the opportunity to craft your own custom cluster. Begin by selecting a name and region that aligns with your preferences. In this guide, we'll proceed with the utilization of PipeOps' provided DevTest cluster template. Once your choices are in place, finalize the process by clicking the "Start Creating" button.

Note: It's important to highlight that we are currently employing the PipeOps DevTest cluster configuration template. However, it's crucial to note that this template is not suitable for projects at a production-level or large scale.
After the successful creation of your cluster, you'll be presented with a visual output resembling the image depicted below:

Deploying your FastAPI project
To begin the deployment process, the first step is to create a new web project on PipeOps by clicking on the “New Project” button:

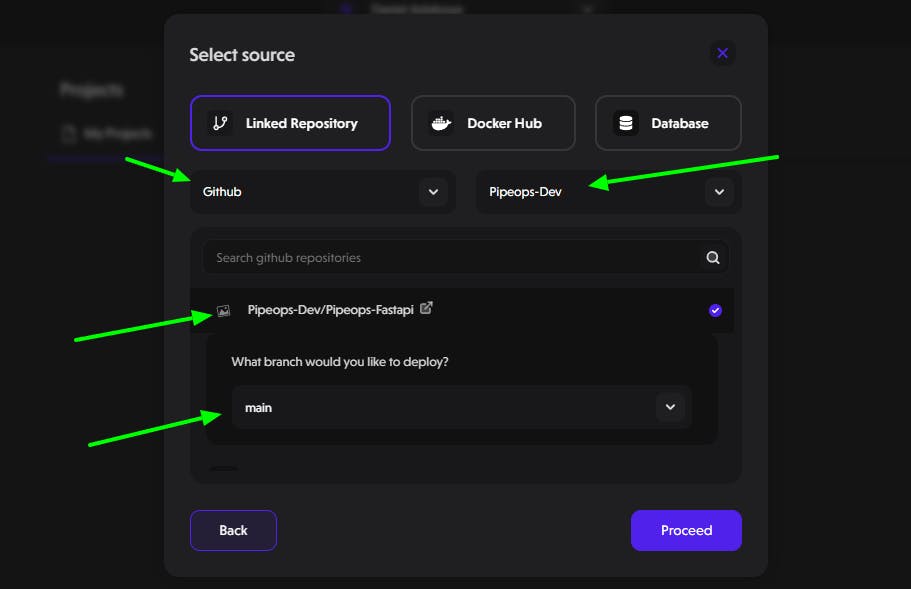
you need to select Github as your repository source. After that, you can select your account name to access the list of repositories that you own. From there, select your FastAPI project repository to work with after that click on proceed.
You will see the image below. You can also update your environment from pipeops-3d5d0Bea to production and your server/cluster if you have multiple, but we will use pipeops-3d5d0Bea for this case.

Once you've clicked the "Proceed" button, the interface will guide you to the project build settings page. Here, you have the opportunity to make selections regarding the preferred framework or programming language, as well as the build method that aligns with your preferences. (In this guide, we're deploying the PipeOps starter kit, which comes with a preconfigured Dockerfile. Find it here). Notably, PipeOps also provides a feature enabling the addition of project-specific environment variables, thereby allowing for customized deployment settings tailored to your project's needs.
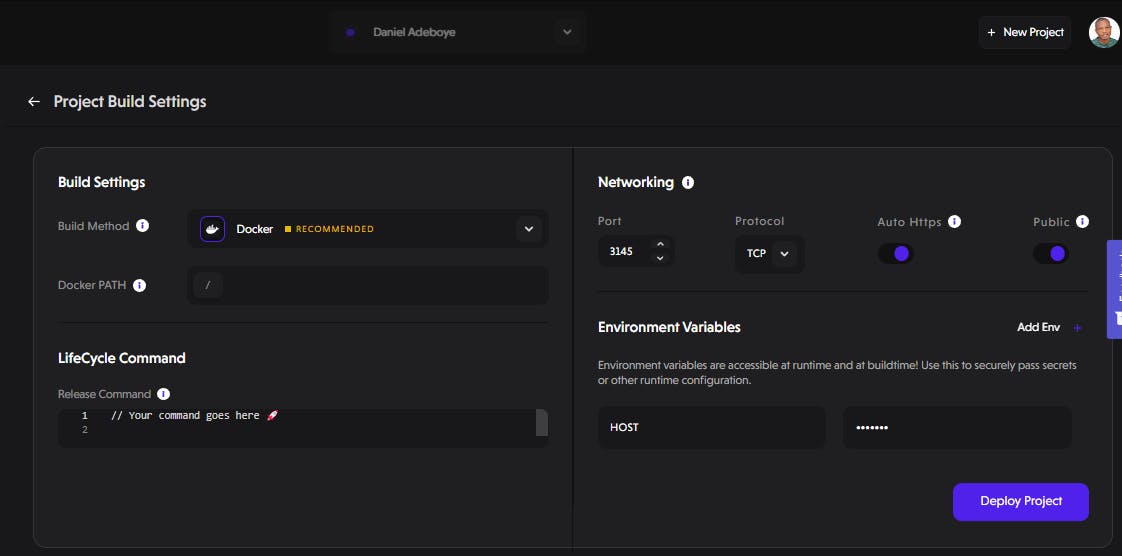
Click on the "Deploy Project" button to deploy your bot. Once the deployment is complete, you will see a success message as shown in the image below.

Conclusion
In summary, this guide outlines a straightforward approach to deploying your FastAPI project on AWS using PipeOps. By connecting AWS and PipeOps, you can effortlessly set up clusters, link your GitHub repository, and customize deployment settings. This process simplifies cloud deployment, even for those less familiar with DevOps. Through this combined solution, your FastAPI project can be deployed with confidence, ensuring a scalable and reliable backend system.